TOPCHIP ELECTRONICS as an agent of electronic components, I still have a certain understanding of circuit diagram welding. ,follow these steps:
1. Preparation:
a. Assemble the necessary tools and materials: soldering iron, solder (rosin-core recommended), soldering stand, heat-resistant pad or surface, wire strippers, tweezers, helping hands (optional), and a circuit diagram.
b. Familiarize yourself with the circuit diagram and understand the components, connections, and layout.
c. Gather all the components and ensure they match the specifications in the diagram.
2. Clean components and soldering iron:
a. Make sure the components and their leads are free from dirt and oxidation.
b. Clean the soldering iron tip with a damp sponge or a tip cleaner to remove any leftover solder and contaminants.
3. Set up your workspace and components:
a. Place the heat-resistant pad or surface on your work desk to prevent damage from heat.
b. Secure the components on the PCB (printed circuit board) or other holding devices. Use helping hands if necessary.
c. Organize your components according to the circuit diagram to help streamline the soldering process.
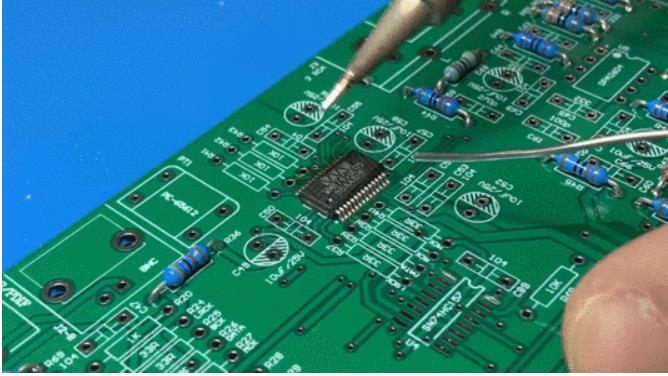
4. Soldering process:
a. Heat the soldering iron to the proper temperature (around 350°C or 662°F for most applications).
b. Hold the soldering iron like a pencil and touch the tip to the joint on the PCB where the component lead and the pad meet. Hold it for 1-2 seconds to heat the joint.
c. Apply solder to the heated joint (not the soldering iron tip). The solder should flow smoothly over the joint and form a volcano-like shape. Remove solder and soldering iron simultaneously.
d. Let the solder cool for a few seconds until it solidifies. The joint should be smooth, shiny, and well-formed.
e. Repeat the process for all components and joints according to the circuit diagram.
5. Inspection and testing:
a. Visually inspect all solder joints for cold solder joints, bridges (accidental connections), and other issues.
b. Use a multimeter or a circuit tester to check for continuity, proper voltages, and resistance values.
c. Power on the circuit and verify its functionality.
6. Clean up:
a. Turn off and unplug the soldering iron, and place it in its stand to cool down.
b. If flux residue is present, clean the board with isopropyl alcohol and a brush.
c. Trim any excess component leads.
By following these steps, you can ensure accurate soldering according to the given circuit diagram. Remember to work carefully and patiently, always maintaining a well-organized and clean workspace. And don't forget, practice makes perfect.
about Us:
TOPCHIP ELECTRONICS
Founded in 2012 TOPCHIP ELECTRONICS is one of the largest indepedent distributors of semiconductor and passive components. With headquarter in California, USA, TOPCHIP ELECTRONICS currently has more than 80,000 different components in stock and provides superior service and support to military, aerospace, and industrial OEMs and CEMs around the world. TOPCHIP ELECTRONICS is renowned for its world-class efficiency, superior services,and extraordinary ability to supply electronic components that are hard to find and even obsolete.We have taken pride in our innovation, reliability and service, especially in the semiconductor marketplace. Our distribution brands include TEXAS INSTRUMENTS,ON,ST,TOSHIBA, NXP, MICROCHIP,CYPRESS,FREESCALE,ATMEL,AD, ALTERA,etc. We distributes over 200,000 products ranging from semiconductors to resistors, capacitors, diodes, inductors, connectors, transistors, sensors and so on. Our mission is to meet and exceed all the expecations of what we supply to customers.
Contact Us